Pages

Thursday 15 November 2018

Dress No. 1 from 100 Acts of Sewing

Here's something you probalby weren't expecting from me! A WOVEN dress! And, I had to trace the pattern! I don't even know who I am anymore.


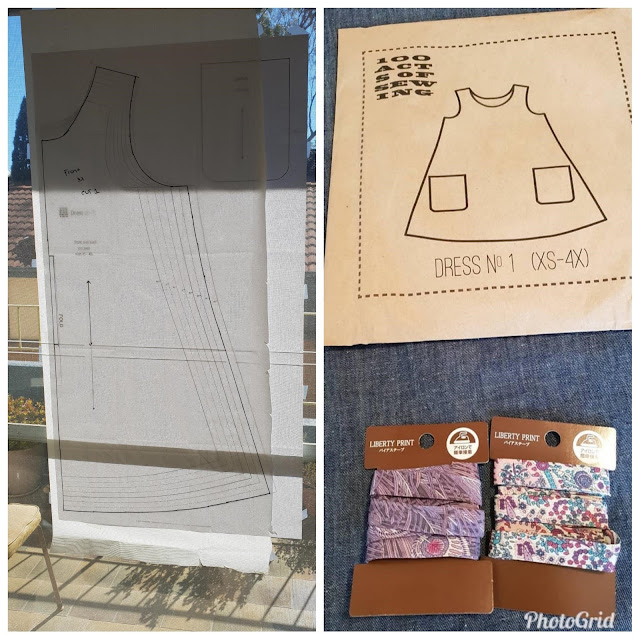
I got it into my head that I wanted to make the Dress No. 1 from 100 Acts of Sewing but I kept putting it off as the pattern was only availble as a paper copy that I had to order from the USA. Eventually I caved and forked out A LOT of money to have it shipped here. And then I had to trace it TWICE as my muslin was too small across the bust.


For the price I paid I have to say I was expecting...more. The pattern is just a single sheet with the same piece for the front and back (good if you have no boobs, or boobs on your back to even things up). In order to lower the neckline the instructions have you cut into the front of your dress to get your desired neck depth. Hmm....I'd rather do this via the pattern than cutting into the actual, partially-made, dress.


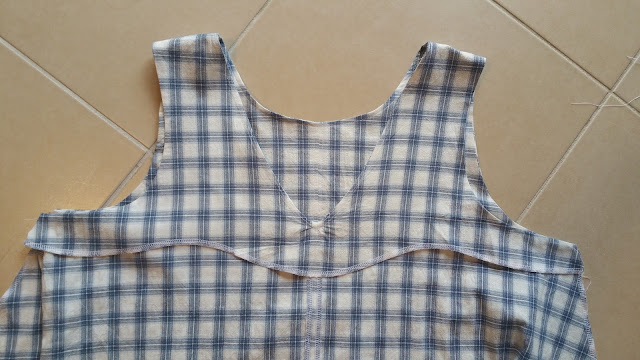
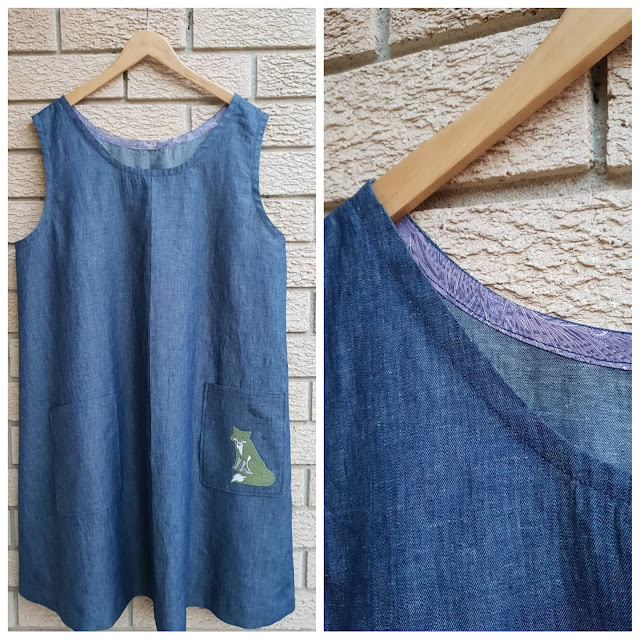
The second muslin turned out OK...but I hate the fabric (it's stiff and crunchy and feels yuck) and the addtion of the fox patch is so twee that it feels like I made a dress for a very large two year old (ie me). The Liberty bias binding is pretty, but the extra folds it has made it hard to handle. And...after I attached the binding under the arms I decided the underarms were too gaping so some surgery happened. I'm going to cut this up to use for bag lining so all is not lost.


Third times the charm as they say. Well, sort of. 


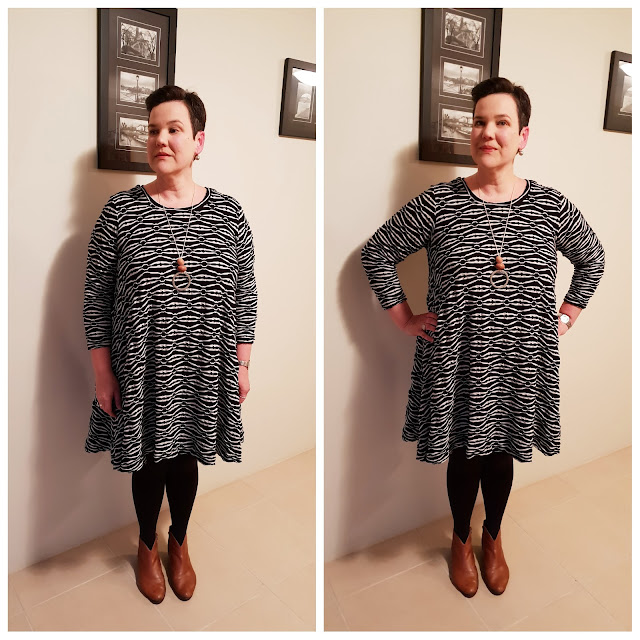
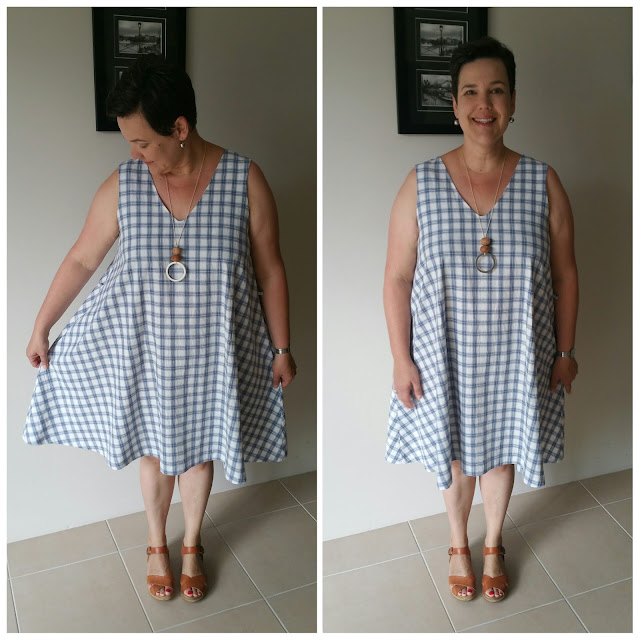
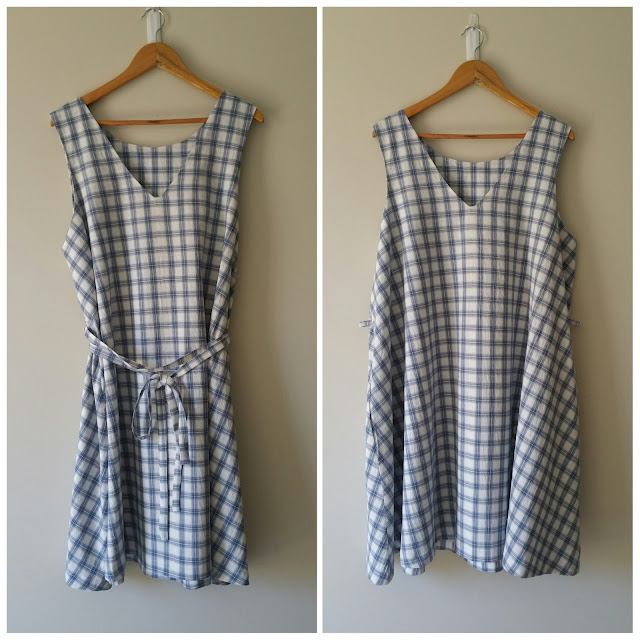
This dress looks pretty (made in fabric from Tomato in Japan) but I didn't find it very comfortable wearing. I'm used to s-t-r-e-t-c-h in my clothes and wearing this dress made me feel like I was in a straight jacket even though it's basically a roomy sack. I think some of the issues may be attributed to the fact that the fabric is very stiff...it would probably be nicer to wear in a soft fabric with lots of drape.


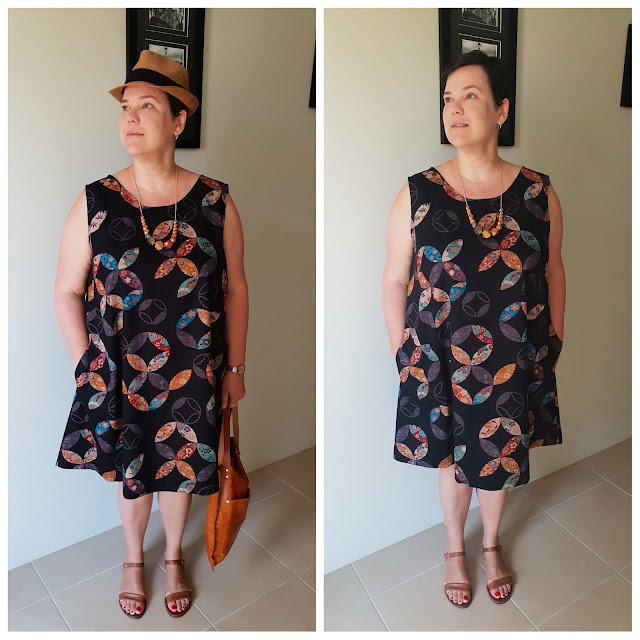
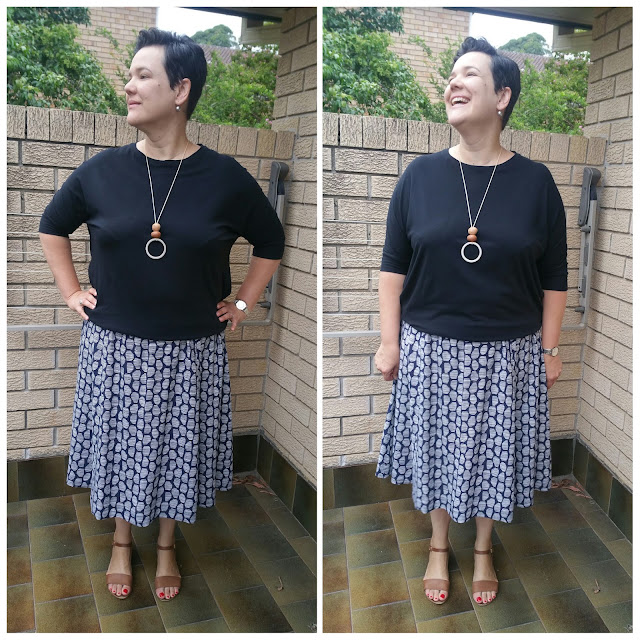
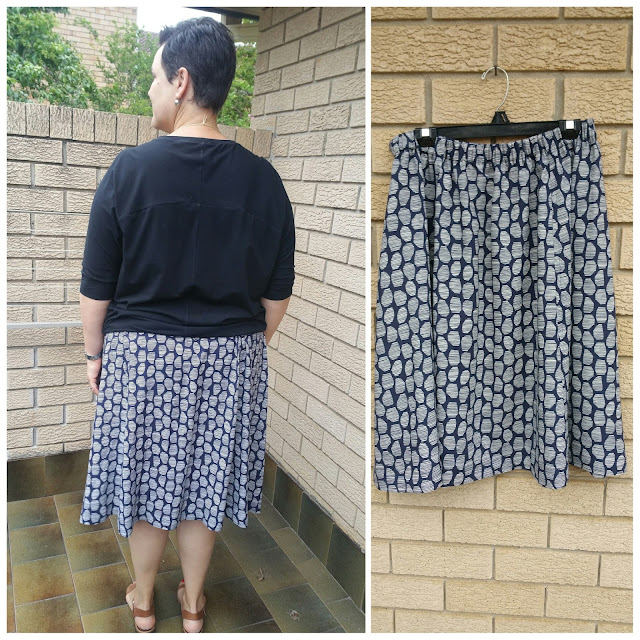
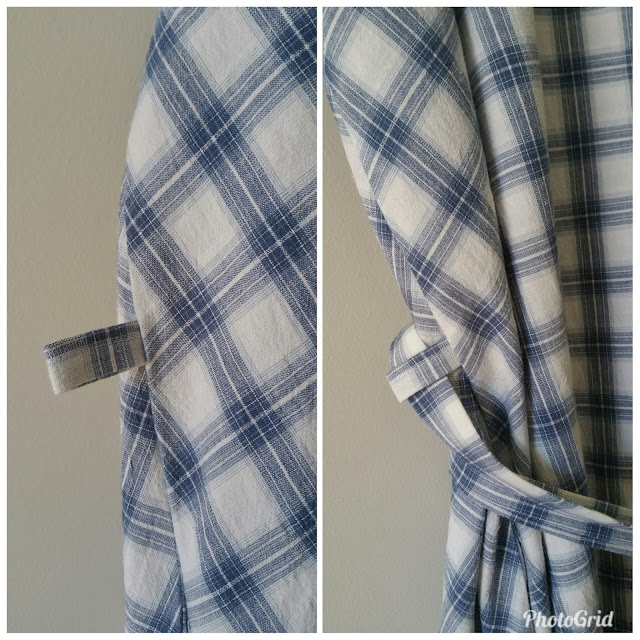
After sewing the chambray version I decided that I really dislike patch pockets. I feel like there's no way for me to attach them without them looking like a craft project. I added pockets into the side seam and I really like them. I stitched the down to the front of the dress to stop them flapping about and getting bunched up.


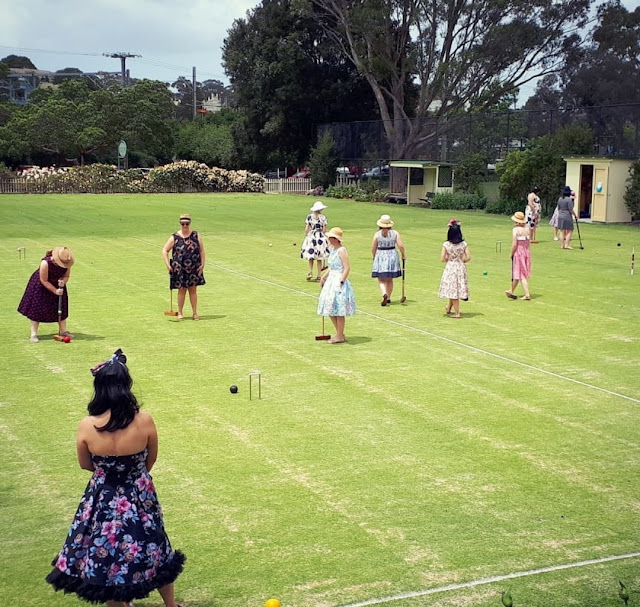
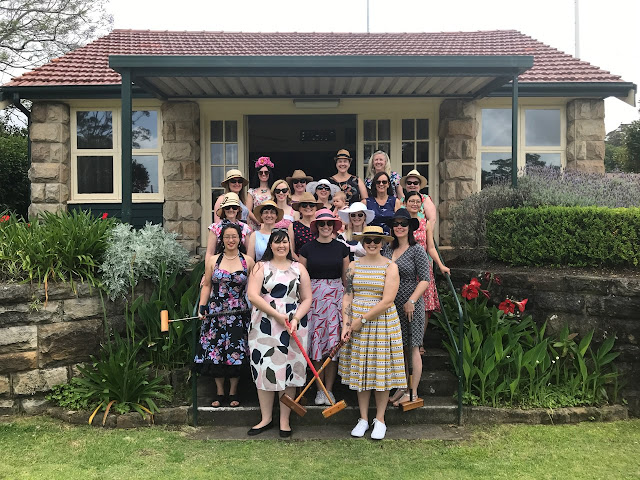
I wore this dress out last Sunday to the Sydney Spoolettes inagrual Croqs and Frocks event. I won my first game so thought that was a good time to retire from my Croquete career and sit in the club house keeping cool and eating snacks.


------

Friday 2 November 2018

The new old Mandy Boat Tee

I've been sewing Tessuti's Mandy Boat Tee for over four years  (and 20kgs ago). I made my first one in a class at Tessuti and the pattern was WAY too small for me then - one size does not fit all! Back then the teacher modified the pattern to fit me by making the sleeves and arm holes bigger. It was my go-to top pattern for years but recently, with the...ah...fullness of my biceps getting..fuller...it just didn't really fit anymore *sad face*.

Just recently Tessuti re-released the pattern and it now includes four sizes. I decided to give the size 4 a go. I wasn't feeling optimistic as the new sleeve pattern was the same size as the modified one I had from my class all those years ago. HOWEVER....I'm very please to say that the new pattern fits me very well! Whilst the sleeve pieces are the same size as my old pattern the shoulders on the size 4 are dropped more so the sleeve/armhole join no longer hit me at the fullest part of my arm.


I've worn this top a few times since finishing it a few weeks ago and I really like it. The length is as drafted and it works well with my current wide-legged pants obsession.

The fabric* (some sort of viscose knit) was a nightmare to work with but the print is great. I bought the fabric on a Spoolettes shopping trip to Cabramatta a few weeks ago - $7/meter. It was cut badly and was off grain but I like the end result so the pain of sewing it is a distant memory.


Of course when you make something you like you back it up straight away by sewing a second one! I added an inch to the length of this one but sewed a 2" hem (I didn't like the mean little hem on my first make). Despite my sad face in these photos I LOVE THIS TOP. The fabric* (some sort of viscose knit) was bought from the markets in Hanoi so has good memories attached to it. It's been in my stash for 18 months and I'm glad to finally have it made into something I like.


Here's a close up of the fabric - cute, right? And it looks extra cute with the twee little birdie necklace.


Of course two of these tops is just not enough so I'm in the process of sewing up a black one. It,s going to be too hot soon to wear them but I'm hoping they'll work from my trip to Taipei at NYE.

* both of these fabrics are very light, drapey and quite stretchy. If I was to make this pattern in something with less stretch I'd probably not be quite so happy.

------

Monday 27 August 2018

A crazy-difficult-to-sew Ebony Dress

If anyone has ever skied moguls you'll know what I mean when I say that this fabric is the sewing equivalent of that! I've sewn with "textured" fabric before but this was something else. My overlocker did not like it at all and bumped its way over the speed-bump-like fabric...and the sewing machine I had borrowed from my sister-in-law whilst mine was being serviced didn't like it much either.  Looking at the fabric in My Hung I had no idea how...difficult it would be, but I didn't give up and now I have a new, rather badly sewn dress! I guess you call that a win? 

Would you look at that wonky zigzagging! Oh boy!
Yes, this is another Closet Case Patterns"Ebony Tee". I'm still in serious need of winter clothing (we're having a cold snap to see in the end of winter) and this dress is comfortable and cozy.  I've made two other dresses from this pattern recently (not blogged) that have been fails as the fabric hasn't had enough stretch so they've not fitted but this one is a winner. I'm ignoring the wonky zigzagging on the hem/sleeves as the fabric does a good job of hiding it...and unless you look really closely you can't tell things when a bit crazy with my sewing.


I wore this dress out on Saturday night for dinner with the Sydney Spoolettes and I felt great in it (though I did spill caramel sauce all over it but thankfully it's washed right out)!


-------

Pattern: Closet Case Files "Ebony Tee"
Size: 16
Modifications: 1" full bicep adjustment
Fabric: My Hung Fabrics in Parramatta - 27% Polyester / 68% Viscose  Rayon / 5% Spandex
Changes for next time: none

Friday 24 August 2018

Leather Bag

Instagram tells me I bought this leather hide from an outing to Birdsall Leather back in May 2016. I had plans to make a tote from it but wasn't feeling brave enough to tackle it back then so it's been rolled up and hidden under my fabric cupboard ever since. That said I did use a very tiny piece of it to make a clutch about a year ago.

Over the last few months the Genoa Tote I made back in January 2017, and used daily, was starting to look a little worse for wear. It kinda also started to smell so I put it through the washing machine -- leather handles and all ! I NEEDED a new bag, and I needed it NOW!


I modeled this bag loosely on my Genoa Tote by including a key clip, internal (though zipperless) internal pocket and I also used a set of handles I'd bought for a Genoa Tote plus I added in a handy front pocket. The bag itself is just two A3 size pieces of leather sewn together with the seams on the outside. I've this type of seam treatment around and quite liked it. It took about 90 minutes from beginning to end - including cutting out the leather.


My machine handled the leather...sort of OK, but it wasn't all smooth sailing as the foot didn't really move along the leather very well so there are so very small stitches with the sewing stalled a bit. It was also really really hard to sew a straight line so things are a bit skewiff but I don't think it's very noticeable.


When  I first used the bag I found that it was too deep and not wide enough - it was annoying to try and find things in it so I ended up buying myself a work bag that has worked much better. This week I've been on annual leave between jobs and have started using the bag again and without all the cr@p I lug to the office it's proving to be nicer to use. I've even received a few unsolicited comments on it which is always the ultimate when your wearing your handmade stuff!

Wednesday 15 August 2018

Peppermint Magazine Pleated Summer Dress + a class

All of a sudden I'm interested in sewing woven dresses (who am I?) After the success of my Papercut Sway Dress I decided it was time to upskill a little so I enrolled in the Intermediate Dress Class at my beloved Sew Make Create. The class takes place over three full Saturdays and in the end you end up with a dress...all overseen by the lovely Pepper pooch.


Real talk. I ended up with a dress that's too big for me BUT I learned a tonne of stuff so I'm pretty happy. The pattern does have a lot of ease but I was nervous about it not fitting so couldn't be talked down from the size I chose. It was a free pattern and the fabric was only $15 (in total) from Cambodia so nothing lost really. Plus Dave funded part of the class as a birthday gift so...


I chose this dress as it had quite a few "new to me things". A hidden button placket, buttonholes (I have even bought myself a buttonhole foot since the class), pleats plus we undertook a Full Bust Adjustment which involved a lot of maths but I could probably do it again on my own. 


I'm proud that I finished the dress and learned a lot in the process. That said, I'm considering now unpicking the skirt from the bodice and adding in an elastic waistband and still wearing the skirt. I'll see how I feel about actually doing that when the time comes though.

----

Pattern: Peppermint Magazine Pleated Summer Dress
Size: H
Modifications: 1" FBA plus some changes on the fly to get the skirt & bodice to fit together
Fabric:  cotton chambray bought from the Russian Markets in Phnom Penh, Cambodia
Changes for next time: none - this dress is WAY to involved for me to have a second go around. 

Thursday 9 August 2018

(another) Ebony Tee

Now that I've mastered the Full Bicep Adjustment for this pattern I was REALLY keen to remake my favourite #ebonyTee with a roomier sleeve and perhaps a bit more length so I could wear it with skinny pants and feel super comfortable. A quick dash to my local fabric store confirmed what I already knew deep in my heart...the fabric had long ago sold out *sad face*. So I left with this instead. Same same...but different. 


I sewed this up over the course of a few hours whilst I was home sick last week. It really took all day as I would do one step and then take a break on the couch to watch another episode of The Good Wife (a show which I'm thoroughly enjoying).  


I added an extra inch to the length of the top and think I have good coverage now for skinny pant wearing. The hem is finished with the rolled hem on my overlocker. 


---

Pattern: Closet Case Files "Ebony Tee"
Size: 16, wristlet sleeves, jewel neckline
Modifications:  1" full bicep adjustment, added 8.5" to the length. Rolled hem.

Fabricpolyester elastaine from My Hung in Parramatta
Changes for next time: none for View B

Sunday 29 July 2018

Casual #EbonyTee Dress

After a successful Full Bicep Adjustment on my last #ebonyTee dress I hopped online and ordered some long-coveted ribbed knit fabric from Darn Cheap Fabrics. The fabric arrived within a few days and whilst it was a bit more lightweight than I was expecting it was still pretty perfect for the Ebony, so here we are. I've really been struggling to find dresses/tunics for casual (yet somewhat put-together) wear and this fits the bill perfectly. I wore it out to a picnic today and it was perfect (despite the strong winds blowing my dress up and showing my underthings to everyone)!


Pretty pleased with my stripe matching on the sides. It's NOT quite perfect as my cutting was a bit off so there was some stretching to get it to sit this well. Near enough is good enough I think!


I decided to cut the neckband on the bias as I wanted all the colours of the fabric to be seen - I love the way it looks though do wish I'd cut a slightly wider neckband as I think they look nicer.

I REALLY like this dress but it was only until I sewed the hem that I decided that I liked it. As the fabric is so light it felt VERY long and frumpy (almost like it was getting longer as I sewed it) and I wasn't feeling motivated to finish at all but I forced myself to finish it off last night.  I decided on a 2" hem so it sits above my knees at the front and I think this really helps in making it not look like I'm being swallowed in fabric.

I bought the same fabric in a different colour way - I wasn't sure what I was going to make with it, but not it's definitely becoming another #EbonyTee dress.

-------

Pattern: Closet Case Files "Ebony Tee"
Size: 16
Modifications:  1" full bicep adjustment
Fabric: Darn Cheap Fabrics -  
85% Polyester / 10% Viscose / 5% Elastane
Changes for next time: none  

Wednesday 11 July 2018

Big guns need Full Bicep Adjustments!

I have quite literally made an exact replica of the Ebony Tee dress I made last May however this version has nice, comfortable sleeves. I loved that dress - the fabric was LOVELY, and I really loved the shaped too however the sleeves were just too tight so I never, ever wore it. I'd put it on to wear to work and then immediately take it off. Nope.

When I was at the Fabric Store last week I spotted more of this fabric and thought I'd buy 1m and take the sleeves off the old dress and replace them with new, bigger sleeves. Somehow I ended up with 2.5m "just in case" which is lucky as between the overlocking and problematic fabric I could not detach the sleeves.


The only change to this dress was to do a full bicep adjustment. I often find the sleeves on my clothes too tight so I was figuring I should bite the bullet and learn how to do one and I'm so pleased this experiment was successful. I read quite a few different posts/webpages about this adjustment and in the end settled on this one from the Curvy Sewing Collective. After measuring my bicep and the sleeve piece I needed around an extra 1" so this was the perfect method....


And ta-da! Comfortable sleeves. The adjustment has given me an extra inch at the upper arm which tapers to virtually nothing at the wrist. The original sleeve is too tight all over so I'm glad to have more room throughout.

I'm SO HAPPY with this new dress, so happy in fact that I wore it TWO days in a ROW #hearteyes! 


-------

Pattern: Closet Case Files "Ebony Tee"
Size: 16
Modifications:  1" full bicep adjustment
Fabric
Fabric Store - viscose 7.7.& /lycra 6% /polyester 17%

Changes for next time: none  

Wednesday 20 June 2018

A (new) York Pinafore

Wow, it's been a REALLY long time between sewing project and blog posts. I have just NOT been feeling the sewing love recently and despite that I did sew two Mandy Boat Tees that had failed in a spectacular way (here and here) so that put me off sewing even more. One problem is that over the summer my arms seem to have expanded (probably due to overeating and not the humidity) so the sleeves on the Mandy Boat are too tight unless I use some crazy, super stretchy fabric. Hmmm....

However...I had kind of been feeling like perhaps I should be sewing something rather than spending all my free time binge watching Outlander and Scandal but couldn't think of what. I had seen the release of the York Pinafore pattern by Helen's Closet but dismissed as "not for me, not my style" until I heard her talking about it on her podcast...it seemed like a simple sew, in my size range and I had some fabric in the stash that would be perfect for it (a long sold out Cotton/Elastane Stretch Woven Velveteen from Tessuti that I had leftover of from another project). Thus...here we are!


The pattern comes with two options for different types of "patch pockets" but I decided to go sans pockets as I felt it would make the pattern more "streamlined" and also because my sewing is not that neat or straight and dodgy pockets will make the pinafore look homemade in the worst kind of way. I was also jumping right in with my "good fabric" and fitting pockets into a side seam was more than I could bear as it meant basting...ugh ugh. Turns out that was a good decision as I ended up taking in the side seams but 0.75cm each as the cocoon shape was just too much fabric at my hips. I have been thinking about going back and perhaps adding in the kangaroo pocket so watch this space.


Overall this project was a quick and satisfying sew, made even more so by leaving off the pockets. Using bias binding is always super fiddly and slow but it does give a pleasingly neat result that makes me smile smugly whenever I look at it.


I sewed the largest size there was (XXL), and also added an inch to the upper bodice straps to account for a bust size that is bigger than the pattern is drafted for. There are two neckline options and I sewed the more scooped neck version. I ended up taking in the side seams about 0.75cm as it was just too big and I would like to straighten up the seam around the hip area as there's just too much fabric there making me feel bigger than I am. I sewed the longest length available but am going to unpick the hem and take things up about an inch or so.

The VERDICT: Whilst I like the concept of this pinafore what I really hate WITH A PASSION is layering . I hate wearing multiple layers with things riding up and down and me constantly adjusting my clothes. I wore this out to a family do on the weekend and I felt so fat and frumpy. I'm willing to give this another try though once it's shorter and slimmer at the sides; and I'm even thinking of making one in denim that I think would be better to wear in warmer weather - no tights = less layering!

---

Size: XXL
Modifications: a
dded 1" to the upper bodice straps for a large bust. Took in side seams about 0.75cm.
Fabric
Cotton/Elastane Stretch Woven Velveteen from Tessuti
Changes for next time: sew a smaller size/straighten up the hip; reduce the length. 


Sunday 11 March 2018

Another Sewaholic Rae Skirt

After experimenting with a few elastics waisted skirts (here and here) I've returned to my OG pattern  - the Sewaholic Rae Skirt (my original version is here).

I like this pattern as it's made up via a number of panels that taper towards the waist so it's less bulky than the more simple method of sewing two big rectangles of fabric together. That said I didn't get the elastic length quite right, and it turns out this non-roll elastic has a lot of roll. I've really stitched the elastic in so it would be A LOT of effort and unpicking to remove it and replace it. I might replace it but I'm worried the fabric might not cope too well with that.


I have no idea why, but this version of the Rae Skirt is quite a bit longer than my first one. Why would that be - everything is exactly the same as last time?


The fabric is an Atelier Brunette rayon/viscose that I swapped some of my fabric for - one of the Sydney Spoolettes is now the owner of some Nani Iro jersey I was never going to use. I love this fabric - it feels so light and floaty to wear and was so easy to sew with. I looked at getting some more in a different colourway but with currency conversions and shipping it was a firm NO from the bank account.

-----

PatternSewaholic Rae Skirt
Size: 16
Modifications:  none.
Fabric
Atelier Brunette viscose rayon swapped with Tanya (thanks Tanya!)
Changes for next time: none - though use some better elastic!

Saturday 10 March 2018

Papercut Patterns - Sway Dress

This make is a TOTAL departure from what I usual sew or wear...a dress in woven fabric! Who am I anymore?

I think I've mentioned before that I am feeling a little bored with sewing. I can't quite put my finger on why but it's probably a lot to do with sewing the same thing all the time (simple knit garments) and that my skills are not really progressing - I'm not even sure I've learned anything new in years. I have a bit of a mental block with learning - I think things are hard and that I am not clever enough to work them out. Plus I'm lazy. Blah blah blah...


Anyway - I started thinking that I would like to make a non-knit dress. It would have to be sleeveless as I KNOW that I hate tight things on my arms. I didn't really mind too much if the dress didn't actually fit because I wanted to learn something new (not zipper or buttons new mind you). I settled on the Sway Dress by Papercut Patterns as there was a chance it could fit me (spoiler alert: it does) and it has a full-facing installed using the "burrito method" which has never crossed my sewing path before, along with a v-neck, belt loops and self-fabric belt.


All in all this was a fairly simple sew though I did find getting a nice clean point around the v-neck tricky. I also had a bit of trouble understitching the facing around the neckline so to make sure things don't flap around up there I also top-stitched the neckline down.


I felt that when it came to making the burrito for my facing the instructions were quite....brief. I read that part of the notes about 20 times and just thought WTAF every time. I nearly gave up at that point, but I put out a cry for help on our Sydney Spoolettes facebook page and someone sent me a very useful YouTube link (thank you Evelyn). It was actually not very difficult but it really isn't until you pull the fabric through on itself you see that's worked (I have no idea how it worked, it just did)!


I am also pretty chuffed with my belt loops. I was going to leave them off (lazy) but thought I should add them as a) it's a learning experience and b) they might actually be useful. I found them quite fiddly to make so after a few attempts I made them longer than suggested, stitched them up and cut off the excess (they are still 1cm longer than drafted). The belt was quite easy although Dave turned it inside out for me as I was struggling.


Also, pockets!

So, the fabric! This is from Tessuti and they are selling it for $15/pm as part of their Skylines Sewing Competition. I was looking for a linen for my Sway dress and this came along at just the right time. The fabric is 63% cotton, 16% linen, 20% viscose and 1% elastane - it was nice to sew with and held a press well. It was impossible for me to tell the right side from the wrong side so I didn't even bother with it. I wasn't going to submit my dress to the competition but in the end I'm pretty proud of this make - I think it's well made so why not?

The big question now is, belted or unbelted I know which I prefer)?

----

Pattern: Sway Dress by Papercut Patterns
Size: XL
Modifications: none
Fabric:  Skylines - 63% cotton, 16% linen, 20% viscose and 1% elastane from Tessuti.
Changes for next time: none, although I think a more drapey fabric would be better

Sunday 4 March 2018

Made by Rae - Cleo Skirt

I'm continuing my foray into elastic waist woven skirts with the Cleo Skirt by Made by Rae. This skirt has a flat front with an elastic back- I have a few store bought pants with this type of waist and find them quite comfortable. It was actually much easier to install this type of waistband than I thought it was going to be.

The fabric is from My Hung - a cotton that is probably not fluid enough for this skirt. As such I'm find there is just too much fabric going on. I probably could've chosen a smaller size also. I went with the size 2 in the plus size range, but I think a 1 would be more than fine.


I was really excited to learn how to sew this cut-out type of pockets - turns out it's very simple. I would want them deeper however if I were going to make this skirt again. I think I stretched the pockets out of bit though as they don't sit flat like I think they are supposed to.

As I said before the waistband was quite easy to do but there was A LOT of fabric to gather which made things a bit awkward...again, this could be resolved by sewing a smaller size in less stiff fabric.  


I'm glad I made this skirt as I learnt some new things - new to me pocket type, partial elastic waistband, gathers - but I'm not sure the style is for me. I'm just not sure how to wear it - there's A LOT of fabric at the waist so wearing a top over it isn't really an option. I'm not one for wearing tucked tops though I have here just to take a few photos.

---

PatternCleo Skirt by Made by Rae
Size: 2 plus size range
Modifications:  none
Fabric: cotton from My Hung in Parramatta.
Changes for next time: deeper pocket bags, sew a smaller size

A sparkly Simplicity 1366 for Frocktails

Frocktails is done and dusted for another year...and I'm sure some of that (glitter) dust has come from this top. Whilst I did have a dress already made to wear February can be VERY hot in Sydney and I didn't think a polyester elastane dress was going to fly.

This is my trusty Simplicity 1366 top made in a shiny gold foil-knit from The Fabric Store. The fabric is my no means a natural fabric but it's quite thin, and when paired with my Veronika Skirt I felt quite cool all night.

Not much to report as I've made this top so many times before. The fabric is not meant to go through the machine but my dry-cleaning days are behind me so it did go into the wash....which probably explains why I flaked little bits of foil all night.


----

PatternSimplicity 1366
Size: 18
Modifications:  
added 7.5cm to the length, added 1cm to both the side of the front and back neckline and dropped the front neckline a bit. Shortened the sleeves by 5cm.
Fabric: some sort of foil knit fabric from The Fabric Store.

Changes for next time: none

Wednesday 28 February 2018

Kunzea Skirt by Sew Knit Love

I've really been enjoying wearing my Rae Skirt - my foray into the land of the woven skirt/elastic waistband has got me wanting more. But being lazy I want an easier option that sewing all the panels together that comes with the Rae Skirt.

I saw the Kunzea Skirt on Instagram somewhere and thought I'd give it a whirl...it's simply two rectangles of fabric, an enclosed elastic waistband and pockets. I'm sure the entire world, bar me, would just do this without a pattern but I like having a pattern for cutting out and especially so I know the correct placement of the pockets.

Long story short, EPIC FAILURE as the fabric I used (a denim looking cotton bought from Tomato in Tokyo when we were there at the beginning of the year) was just too stiff and the skirt had no drape. If I'd sewn a smaller size, thus using less fabric around my body, it might have been OK but as it was it was just too much fabric to be gathered around my body.


You'd think I'd be upset about this not working out but I've passed it along to a friend who has more curves than me. I think the volume of fabric will sit well on a more curvy figure. I'm really glad it's gone to a good home as I think my friend really likes the skirt.


As for the pattern, the instructions are OK but I think they are lacking in a few areas that may trip up a brand new sewist. I did refer to certain steps in the Rae Skirt pattern to make sure that I was doing things correctly (for example, how much to turn down the waistband).

I'd like to give this skirt another go once I have some nice, drapey fabric.
-----

Pattern
Kunzea Skirt by Sew Knit Love
Size: J
Modifications:  none.
Fabric: denim looking cotton

Changes for next time: probably would sew a smaller size so I have less fabric happening.